Sometime during the past three months of Corona Quarantine, I got the crazy idea that I could build my own furniture. Although I was in the Carpenter’s Union for about 20 years, I was not a carpenter. I was a millwright. Millwrights work more with steel and not so much with wood. For some reason I thought, “I can do this.” Anyway, I’ve been working on a few small projects, but the first real build was storage shelves in my garage, which you can read about here, if you’re so inclined. Having some room to work, I realized that if I am going to build furniture, I needed a workbench. So here’s what I did.
My criteria was pretty simple. I wanted something with at least six feet of work space, about two feet deep. It needed to be easy to build, so as to be within my limited skill level. I also wanted something mobile so I could move it around the garage as necessary. Lastly, I was hoping to keep the cost under $100. It didn’t take me long to find what I was looking for on Youtube. Where else? I watched the video by MrFixIt DIY and it looked like exactly like what I wanted. I’m sure MrFixIt has the plans and cut list available, but after watching the video I felt somewhat confident and made my own drawing and cut list based on MrFixIt’s nice tutorial.
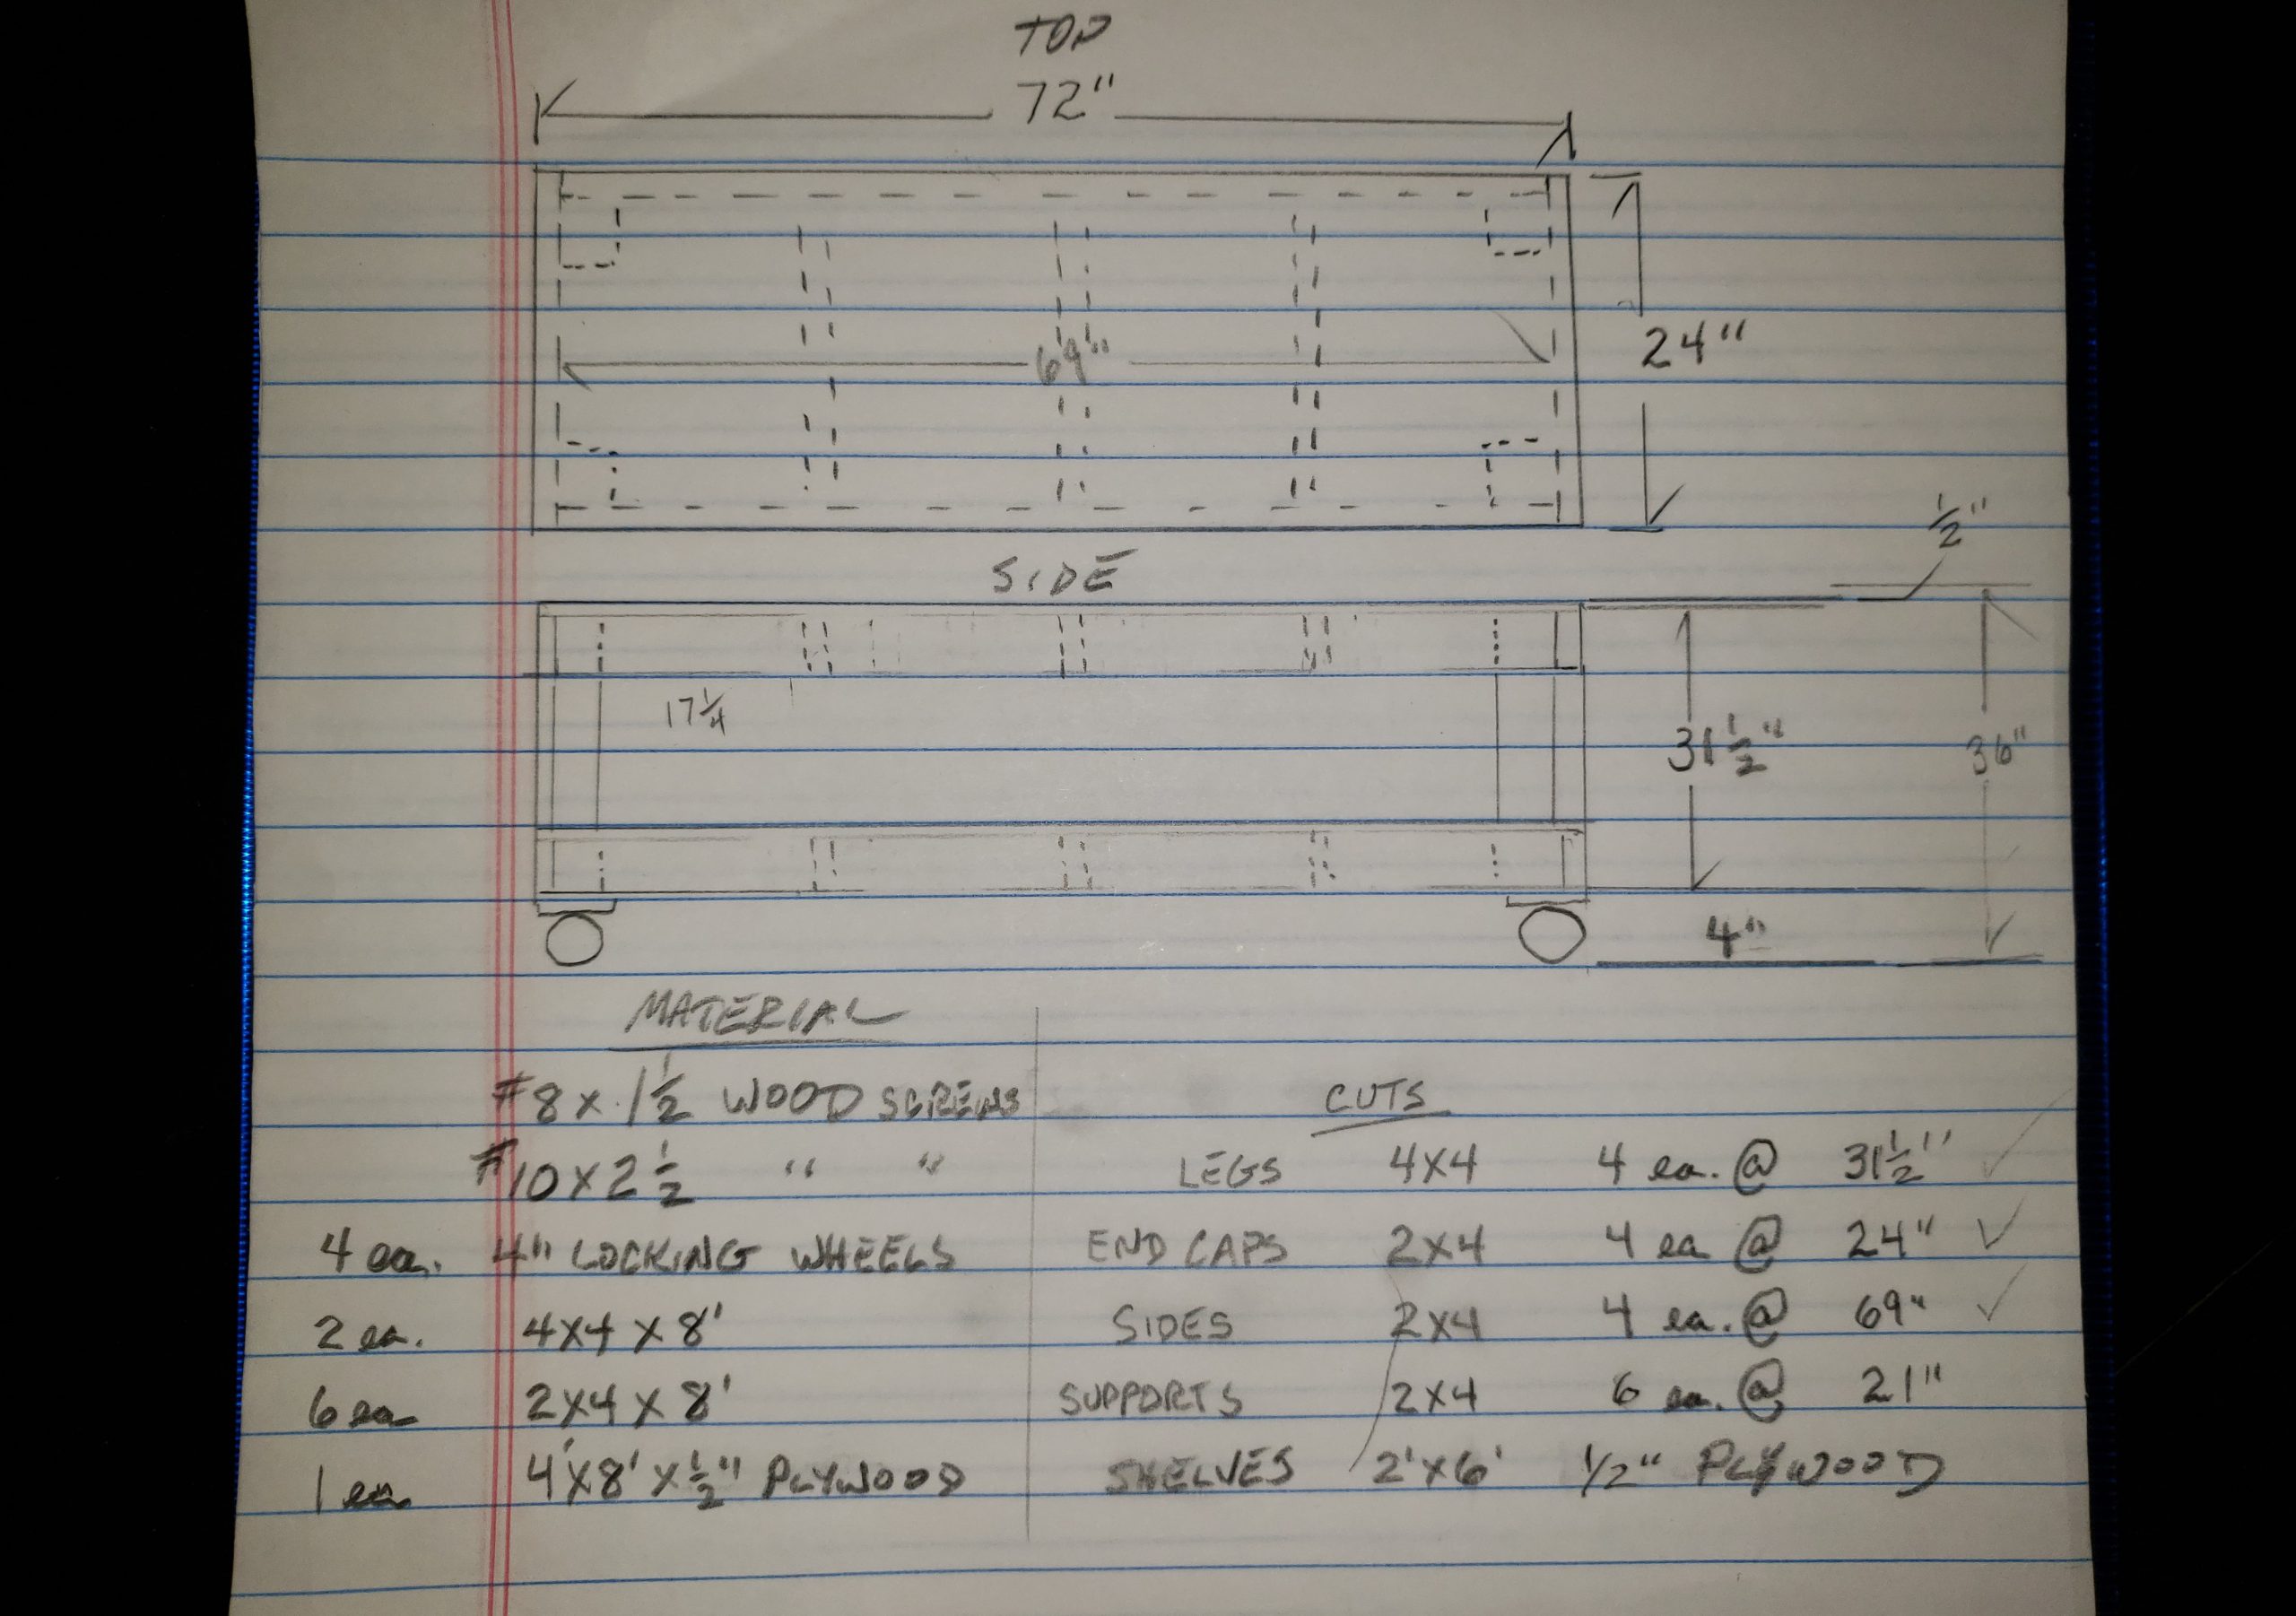
I have included my comprehensive and very professionally drawn plan for this project. Notice the intricate detail given to the caster wheels! When I was a millwright, my boss would come out to the job and draw plans on a napkin, so I guess this is okay. The most expensive item is the wheels, at about $10 each from Lowe’s. Even with the wheels and a sheet of decent 1/2″ plywood, all the material still comes in under $100.
After purchasing all the material and unloading, the next step was to use the cut list and cut all the lumber to their proper sizes. I did that with a miter saw. Or if you are English, I did that with a mitre saw. I used a framing square to make sure the blade is square to the backboard. There are not any bevels or angle cuts on this project which makes it a good one for a beginner like me.
I cut the plywood with a circular saw, on the floor of the garage by laying it on 2×4’s and clamping a straight piece of wood to use as a saw guide. I have a table saw, but since I don’t have a good in-feed and out-feed table and because I am doing this alone, I didn’t think it was safe to rip a full sheet of plywood with the table saw. This workbench project will help with that since it will double as an in-feed or out-feed table for handling long rips.
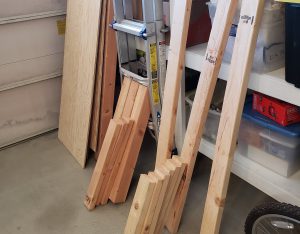
I learned from reading woodworking articles, you should always look for straight lumber when you are buying it. Sometimes perfectly straight isn’t possible or maybe it even looked better in the store and not so good when you got it home. If that is the case, then least make sure that your longest items are cut from the straightest pieces.
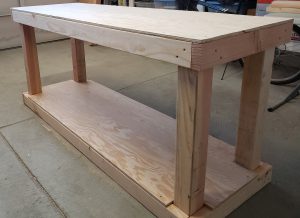
After assembling both the top and bottom frame and the legs, I began to place the supports for each shelf. Even with 1/2 inch plywood, almost six feet is too far to span without a few support cross members. My plan calls for 3 cross pieces for each shelf. Since I wanted them to span the 62 inches of open area under each shelf, I needed to know how far apart to make my center lines for placing each support? The way I do this is to take the number of supports you have, add one to that number and divide the total span. So in this case 62÷4=15.5. So my center lines were at 15-1/2 inches apart.
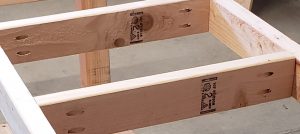
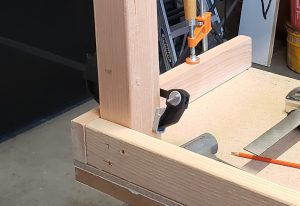
If I remember correctly, in the MrFixIt video, each cross member was secured by drilling through the side rail into its end grain. I decided to go an extra step and use pocket holes, which should provide extra strength to the entire frame. I didn’t add the pocket holes and screws to the material list but, using them would only be a couple of bucks extra, provided you already have a pocket hole jig. Pre-drilling all my supports only took a few minutes. I then clamped my cross members on the center lines, and checked them with a speed square. You can use any type of square that fits the space, but a speed square seems to work best.
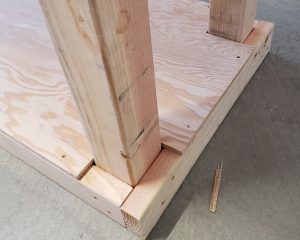
Before installing the bottom shelf, five inch notches had to be cut in each corner to allow the sheet to fit around the leg posts. This was done with a jig saw. You may need to tweek your cuts a little if it doesn’t quite fit between the leg posts. There is an old expression used by carpenters and millwrights that goes, “Measure twice and cut once.” The alternative can get expensive.
If you wanted to get fancy, instead of cutting notches, you could cut holes and build from the bottom upward and by slipping the bottom sheet over each leg. It would look nicer than my notches, but also take more time. My reasoning was this a workbench, not a coffee table. I was not that picky and just followed the video from MrFixIt.
I installed both the lower and upper sheets of plywood and attached them with about twelve 1-1/2″ deck screws. You don’t need a lot of screws here and I didn’t use any on the supports, only the outer frame. I did make sure the corners were secured well and the screws were evenly spaced. I didn’t do any pre-drilling since everything in this workbench is softwood or plywood.
Now that the workbench frame and shelves were finished, I gave the shelf surfaces and edges a medium sanding. I will be leaning up against those edges. I forgot to mention that as I work, I give all the wood I am attaching a light, and I mean very light (only enough to get rid of major splinters) sanding with an orbital sander. Most of this project gets no sanding at all. And no paint. Stuff needs to be able to slide easily across the workbench.
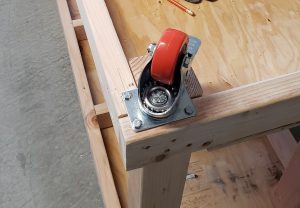
The final step was installing the locking caster wheels. It is important to have swivel wheels on every corner so that you can maneuver the workbench anywhere in your work space that you need to. My intention in the placement of the wheels was that three of the four holes would go on the side rail 2×4’s. This was so there would be only one screw into the end grain of the leg. It is probably not that important in this case but screws don’t hold well in end grain.
I am pleased with how this little project turned out. The workbench has plenty of work space and its design allows for any additions I might want later such as racks or tool holders. On the lower shelf there is lots of room for smaller shelving and even drawers. It is just the right height at 36′ for working comfortably while standing or sitting on a shop stool.
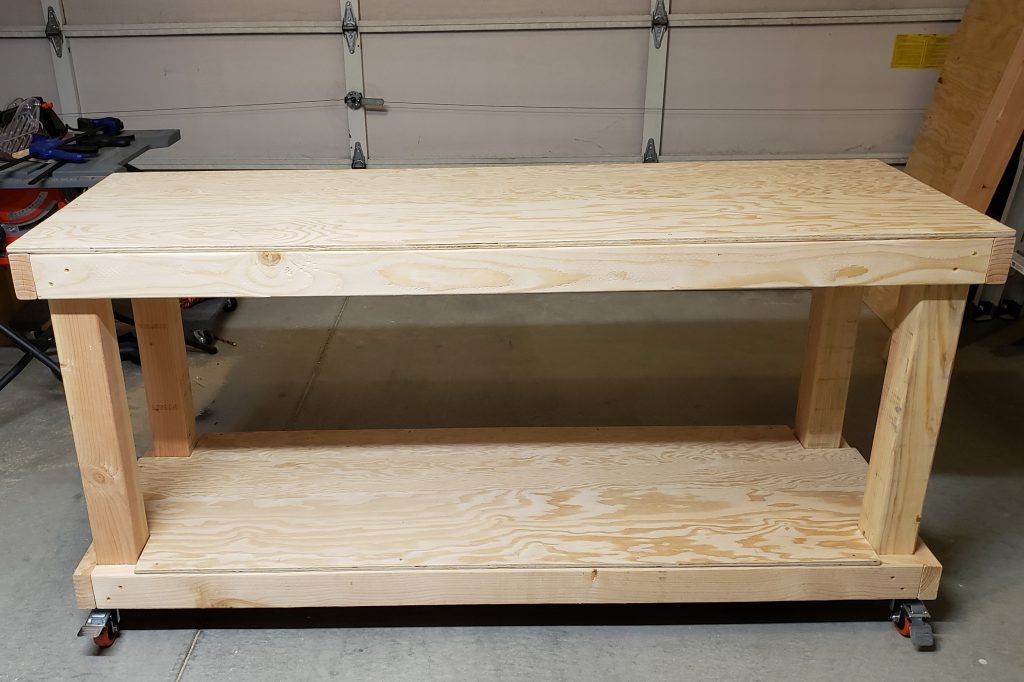
Cheap and easy from start to finish, it took me a little over 6 hours to complete. I stayed under the $100 budget (even using pocket screws and plywood). You can save a little on plywood if you look for a grade that is sanded on one side only. If I had to do it over, I would have looked for Baltic Birch plywood with really nice edges. I think I got pine, which is OK. I thought the edges were very good, but they could have been better. Overall, I am happy with this workbench.
Thanks for reading. Please leave a comment.