For my first attempt at building an actual piece of furniture, I thought I would try to find something simple and easy. After looking at a plethora of articles and videos, I narrowed it down to either an entryway sofa table or a blanket chest. I finally settled on trying to make a Shaker style chest. It turned out to be neither simple or easy.
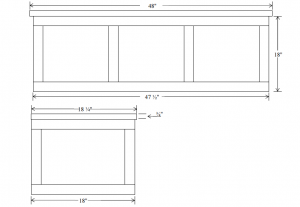
Many of the available plans looked either too simple or too complicated for the result. Some builds used too much wood and looked like overkill while others seemed too flimsy to actually sit on. I decided to create my own plan, using ideas from several others. Here is a very basic design of what I wanted the outside to look like.
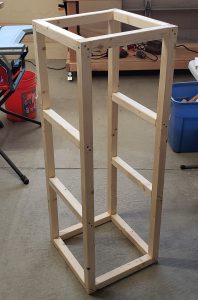
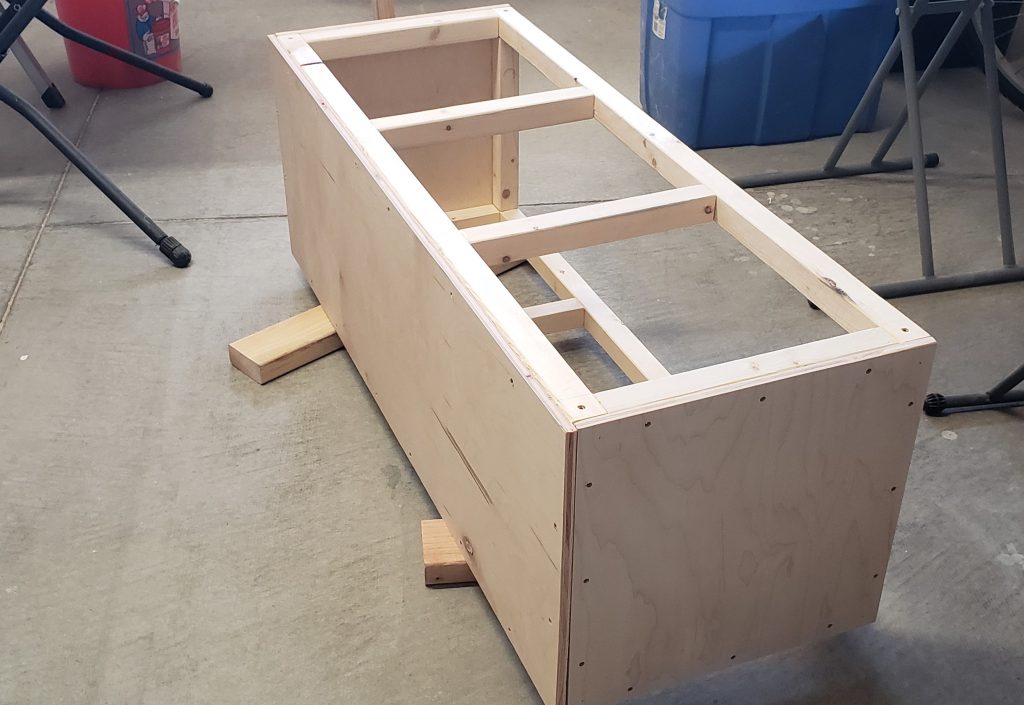
I probably could have just made a plywood box and added the outside trim for that look, but I was thinking that it was a piece of furniture I would be sitting on every morning and I wanted something strong, so I started by subtracting the thickness of the plywood box and the Shaker trim to make a 2×2 inner frame. The plywood box would be built around it. Overkill, I know. It ended up kind of heavy, but it is definitely sturdy.
I tried to keep the inner frame as simple as possible, making the front and rear with 45″ top and bottom rails connected with 4 ea. 13″ supports on each side. Those were then connected with 4 ea. 12 ½” pieces to complete the frame which should measure: 45″ wide, 15½” deep, and 16″ tall. All the joints are butt joints, made with Titebond wood glue and #8-2½” counter sink wood screws. I didn’t worry too much about the strength of the butt joints since this frame is enclosed in the chest plywood. In the only picture I have, it is standing on end. Not sure why I did that.
The wood for the frame is made of all 2×2 pine. Here is the cut list:
- 8 ea. @ 13″ — uprights
- 4 ea. @ 12½” — ends
- 4 ea. @ 45″ — side rails
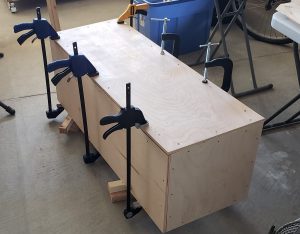
Next, I cut five pieces of ½” plywood to enclose the frame.
Here are the cuts:
- 1 ea. @ 45″x15½” — bottom
- 2 ea. @ 45″x16½” — front & rear
- 2 ea. @ 16½”x15½” — sides
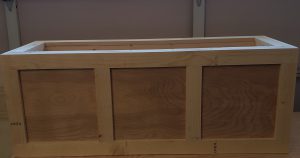
I used wood glue and #8 1¾” screws to attach the plywood starting with the bottom, then the sides, and lastly the front and rear.
I was basically satisfied with the build so far. It was definitely going to be a strong chest. As someone who has not done much woodworking before, I was amazed at how tiny discrepancies in my cuts seemed to be glaring gaps when assembling the pieces. I don’t mean making incorrect cuts, just slight differences in cut sizes. One thing I determined was to try to use a stop block as often as possible when making multiple cuts to ensure they are all the same size. I hope some experience will make me better at this.
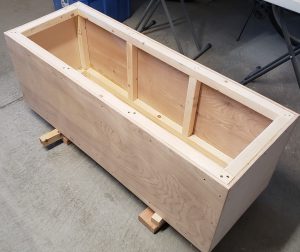
As you can see in the photo of the attached plywood, there are some exposed plywood edges on the top and sides. The Shaker style boards will cover the sides and for the top I wanted to not only cover that plywood edge, but also use a harder wood by installing a top cap for lid area and hinges. This area will be getting the most wear and tear. Using hardwood should help with the holding power of the hinge screws.
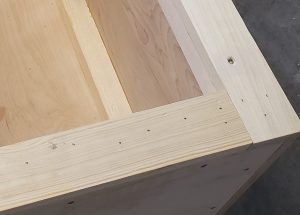
I bought ¾” Ash for this purpose and installed it in 2″ strips. These will be the same length as the frame pieces they cover and a half inch wider to pickup the plywood’s exposed ends. They were installed with wood glue, as usual and a combination of 1¾” screws and 18 GA brads.
- 2 ea. @ 46″ — front and rear
- 2 ea. @ 12½” — sides
Next I cut four ¾”x3″ pieces 16½” long to create a foundation or base supports under the plywood bottom and secured them with glue and 1½” screws. These will have some type of furniture pad adhered to them to prevent scratching the floor.
The Shaker look involved framing the entire chest as shown in the basic design at the top of the page. I thought of trying to bevel the corners at 45° but since this is my first attempt at furniture building, I decided to go again with butt joints. All these pieces were fastened with glue and 18 GA brads. I was hoping the paint would cover them, but I ended up using wood putty on the entire project anyway.
Here is the cut list for the Shaker style using all 2½”x¾” pine:
- 4 ea. @ 47½” — upper and lower, front and rear pieces
- 4 ea. @ 18″ — upper and lower end pieces
- 12 ea. @ 13″ — upright pieces all around
I wanted to use a nice single piece of 2’x4′ wood project board for the lid, but due to shortages in building supplies I had to settle for ¾” MDF. Again, being new at this I didn’t trust myself to properly glue multiple boards together to achieve the same effect. The MDF did add weight to my project, but it sands, cuts, routes and paints beautifully. The lid piece was 48″x18¼” to be mounted flush in the rear, for semi-hidden hinges and having a ¼” overhang in the front.
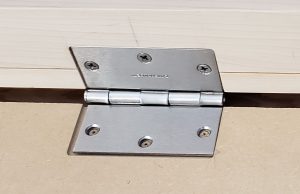
I marked the chest and lid for hinge placement and routed each of the pieces to the depth of both sides of the hinges. The only hinge part showing with the lid closed should be the pin area. I routed just enough area for the lid to sit flush with no gaps.
The hinges I used are 3½” Gatehouse door hinges with a satin-nickle finish. I think they look good and stand out on the white chest. They are also strong enough for a lid of this size without being as bulky as a full door hinge.
I was going to paint the lid and chest separately, but since the lid was already attached, I decided to just mask it off and paint them together. I used a water based semi-gloss white and applied it with a HVLP sprayer. I need to learn a lot more about painting, which is an art in itself. I think my next project I will try using a roller so I can compare the results and the amount of time and work.
After the paint dried, I installed Richelieu Brushed White Lid Supports, which hold the lid at about 85° when open. They were easy to install and work very well. If you are making a toy chest or have a child that may get into your chest, it would be better to install safety hinges which are also commonly sold at most hardware stores.
The final touch for my Shaker chest was adding the furniture pads to the bottom. SoftTouch and Scotch both make good pads that are about ⅛” thick with adhesive backing. Buying the large squares will enable you to cut any size you need. These will truly save your floor from scratch marks during most normal use.
I learned a lot from doing this project, one of the main things being that I have a lot more to learn about woodworking. It was easy to see why people who do this well are really craftspeople and that there are many skills involved in woodworking and furniture making. Although I am a beginner, I have high hopes of learning more with each project I attempt.
Here are some of the project pictures. To see a larger version of a picture, right-click on it and choose “open in new tab.”
Adding plywood sides. 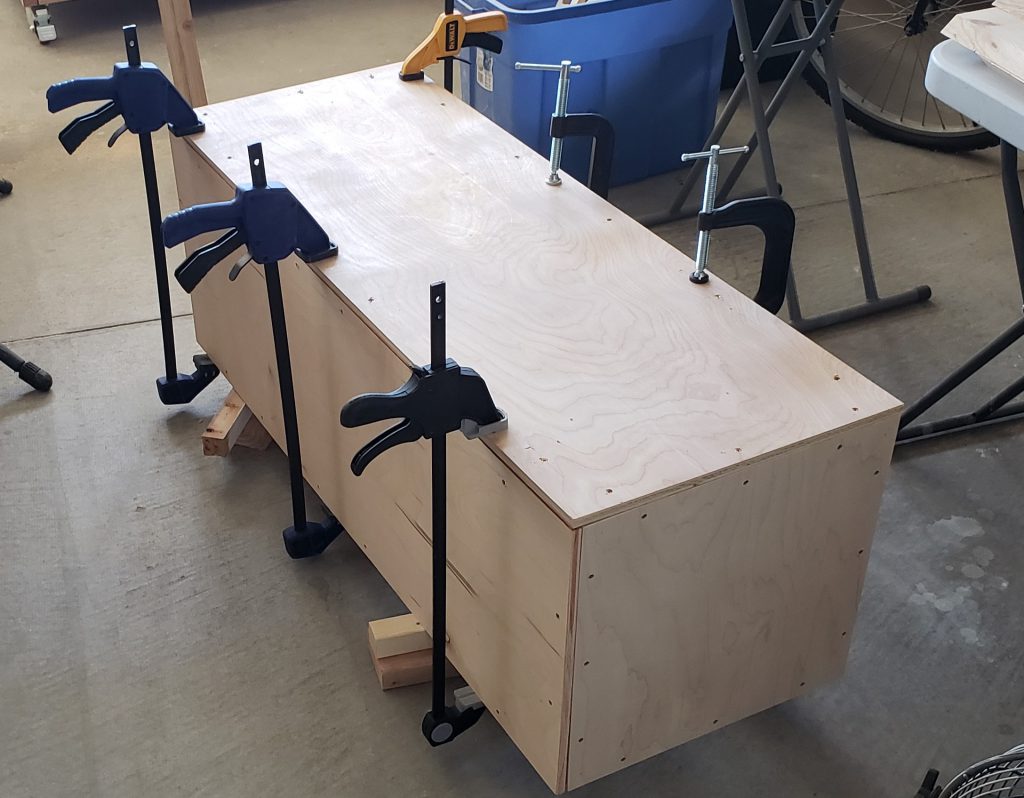
Holding plywood in place. 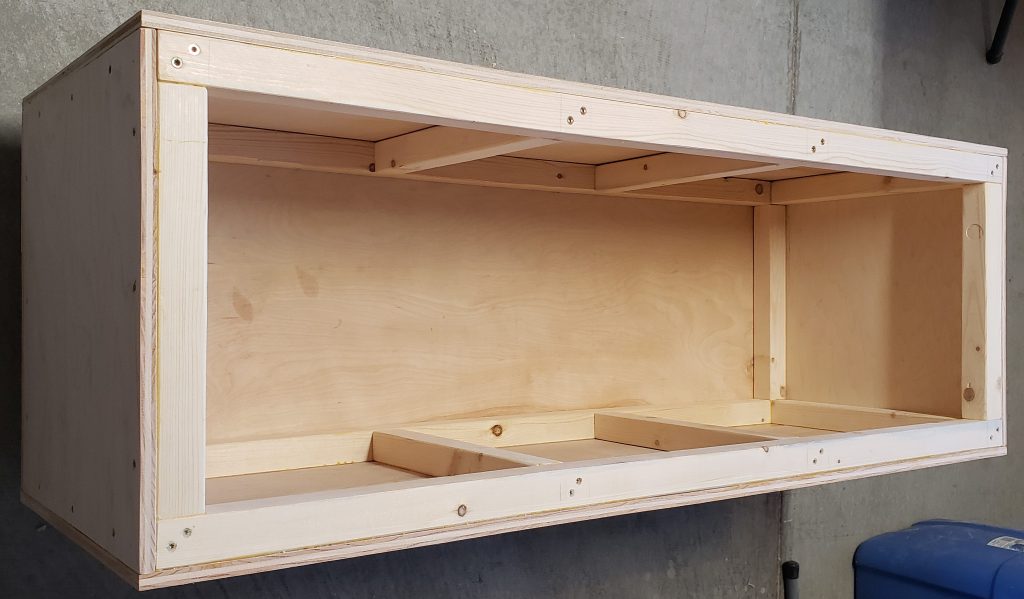
Sides added. 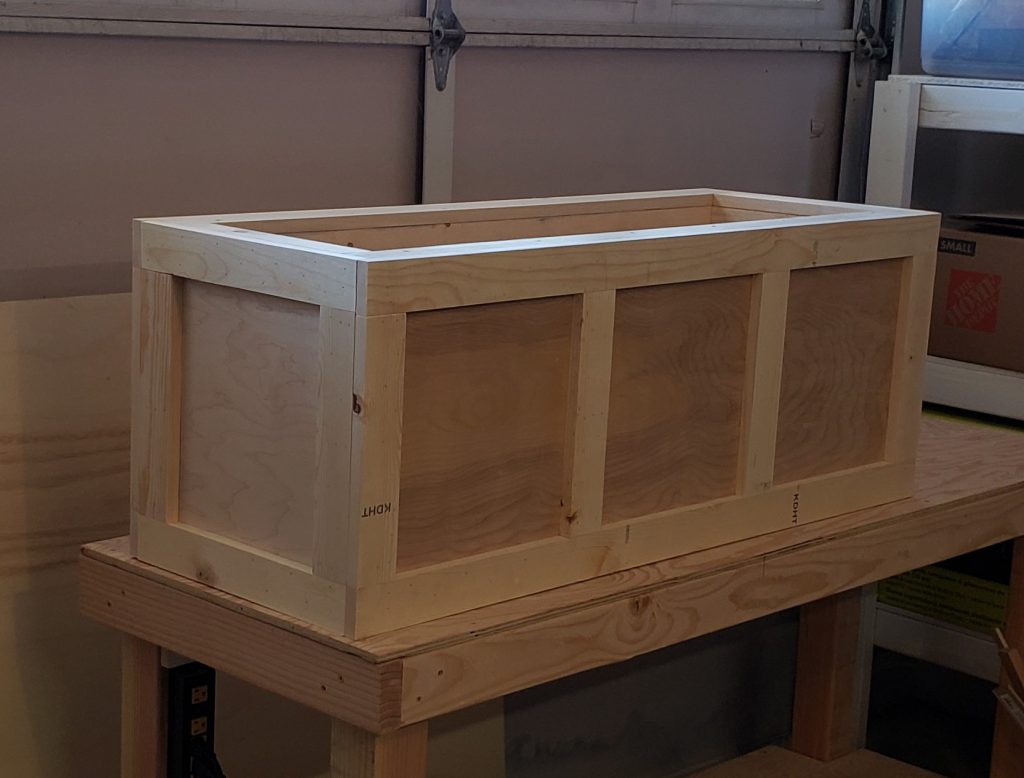
Shaker framing added. 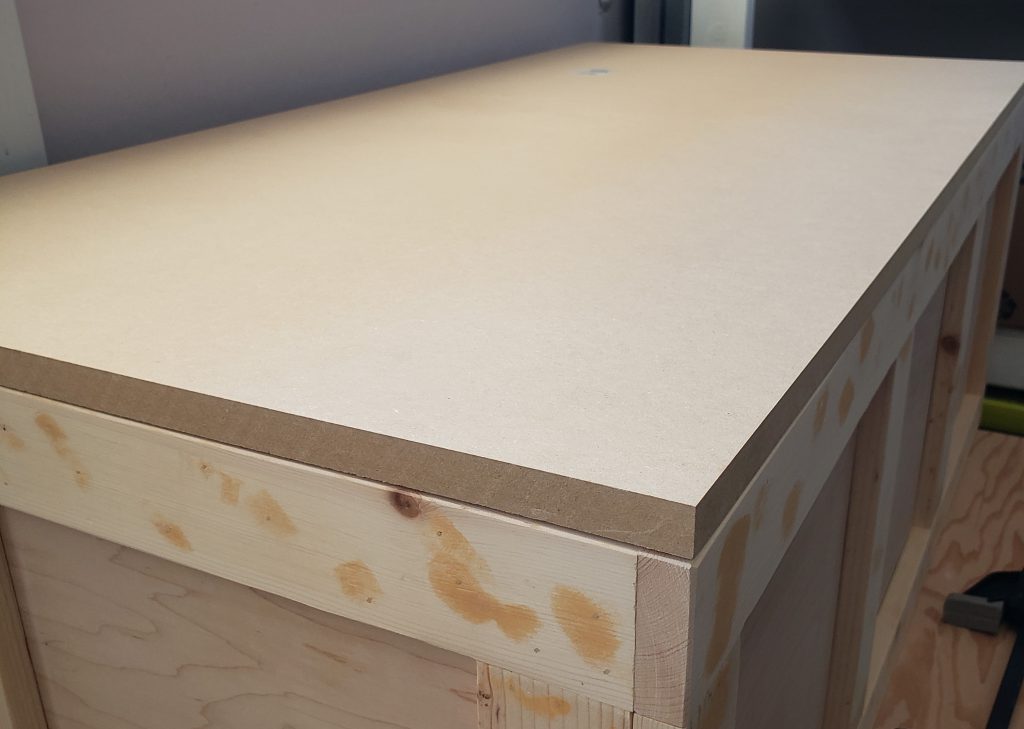
Lid cut and placed. 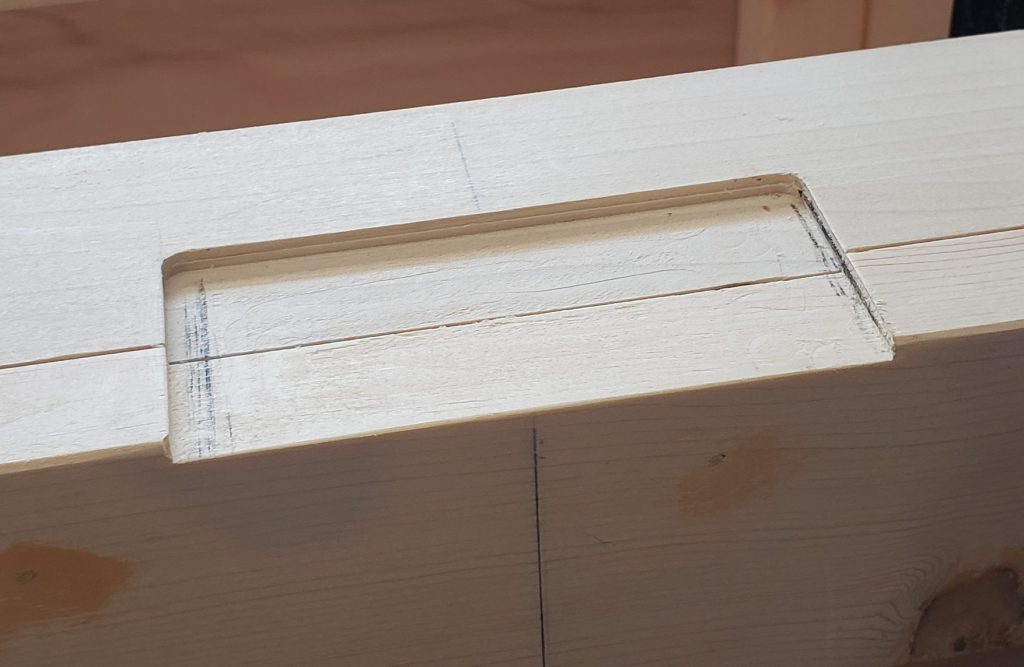
Routing for hinges. 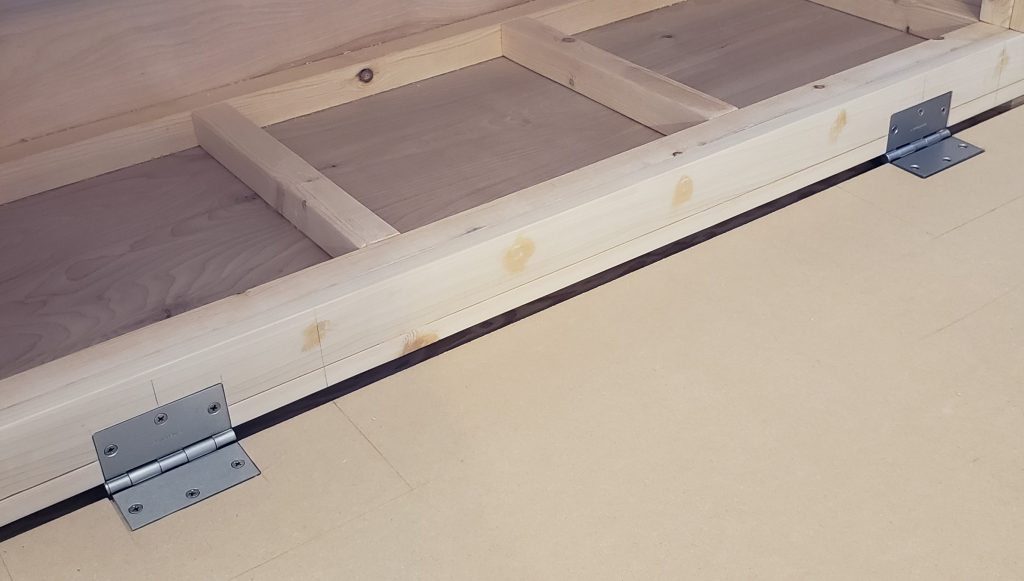
Lid installed. 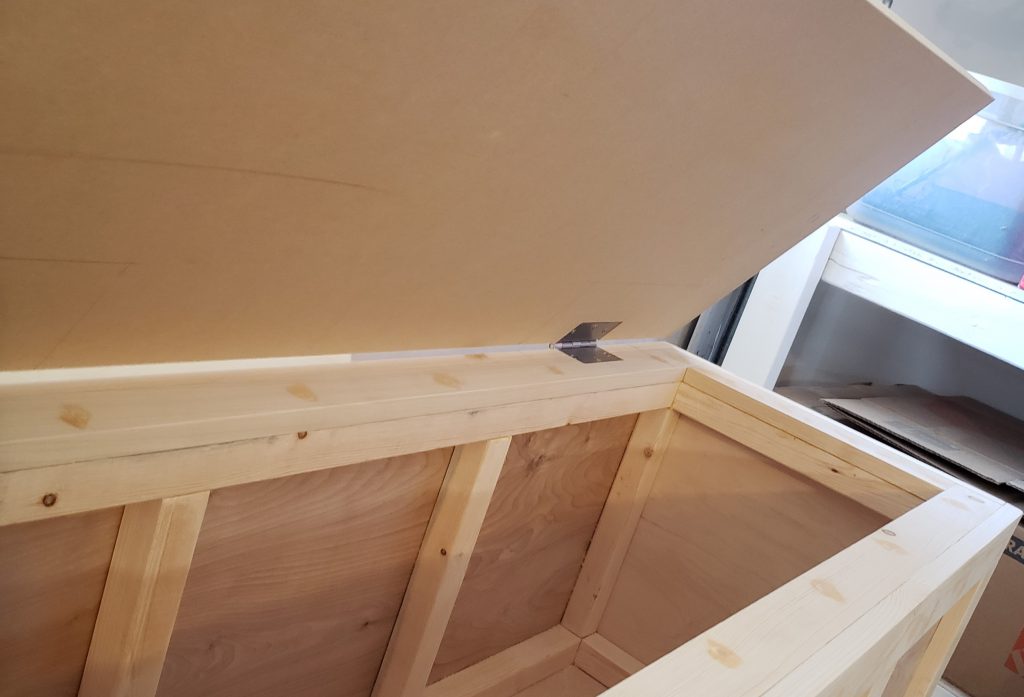
Lid and hinges 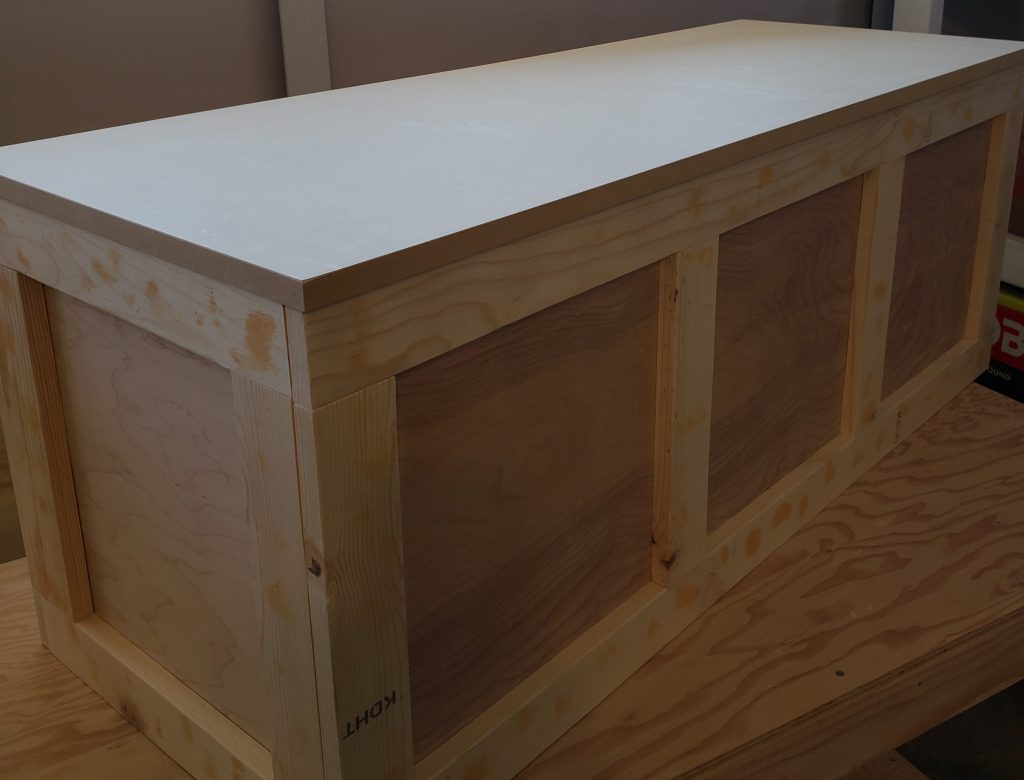
Wood filler before painting 
Painting 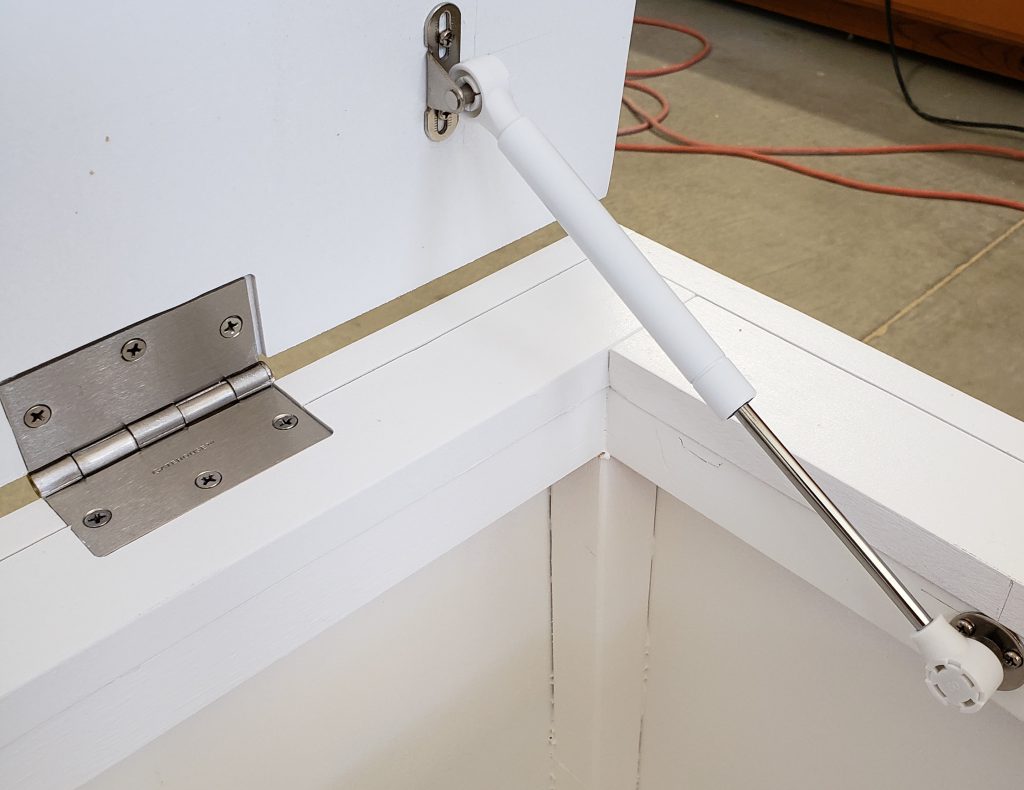
Lid supports 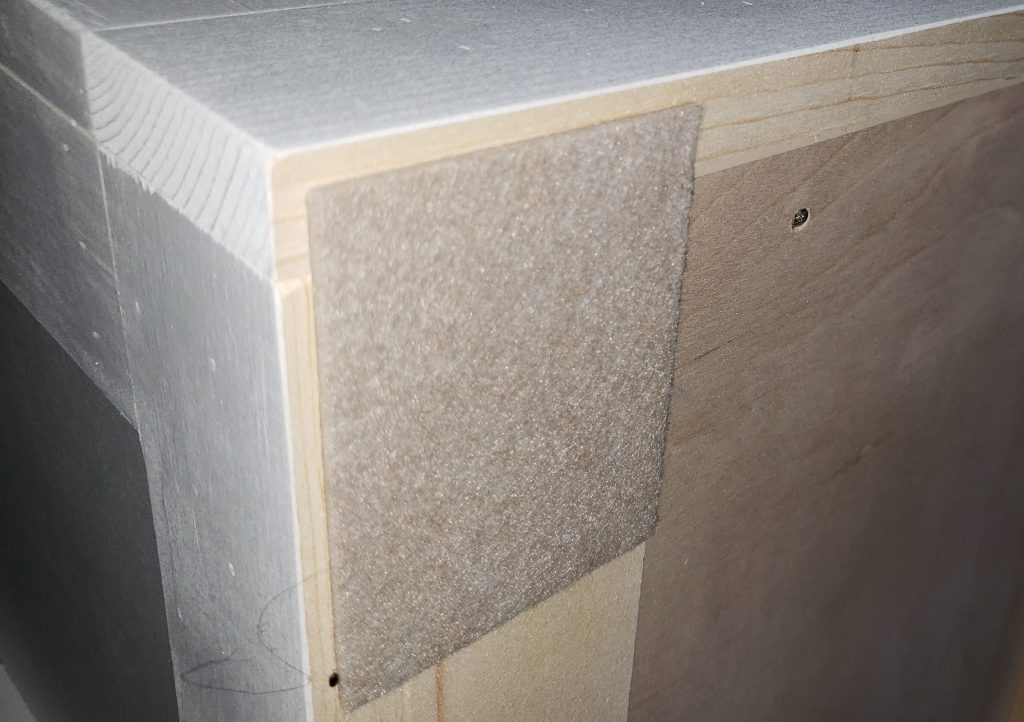
Furniture pads 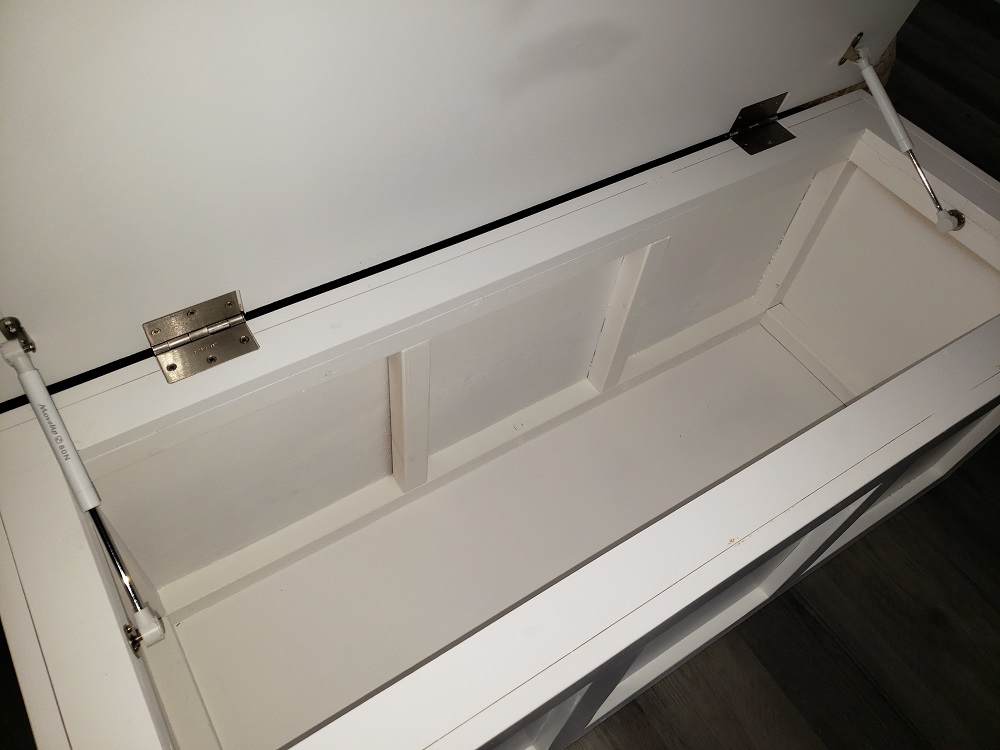
Finished inside 
Finished outside 
Completed project.